Deploy DNS Safety on Microsoft Hyper-V
This article will show you how to deploy the virtual machine of DNS Safety in Microsoft Hyper-V.
First, we need to download the virtual machine ZIP archive and unpack it into some folder on the machine where your Hyper-V server runs, for example into disk C:. The archive should contain three folders as shown on the following output.
C:\dnssafety>dir

 Directory of C:\dnssafety

09/23/2022  03:53 PM <DIR> Snapshots
09/23/2022  03:53 PM <DIR> Virtual Hard Disks
09/23/2022  03:58 PM <DIR> Virtual Machines
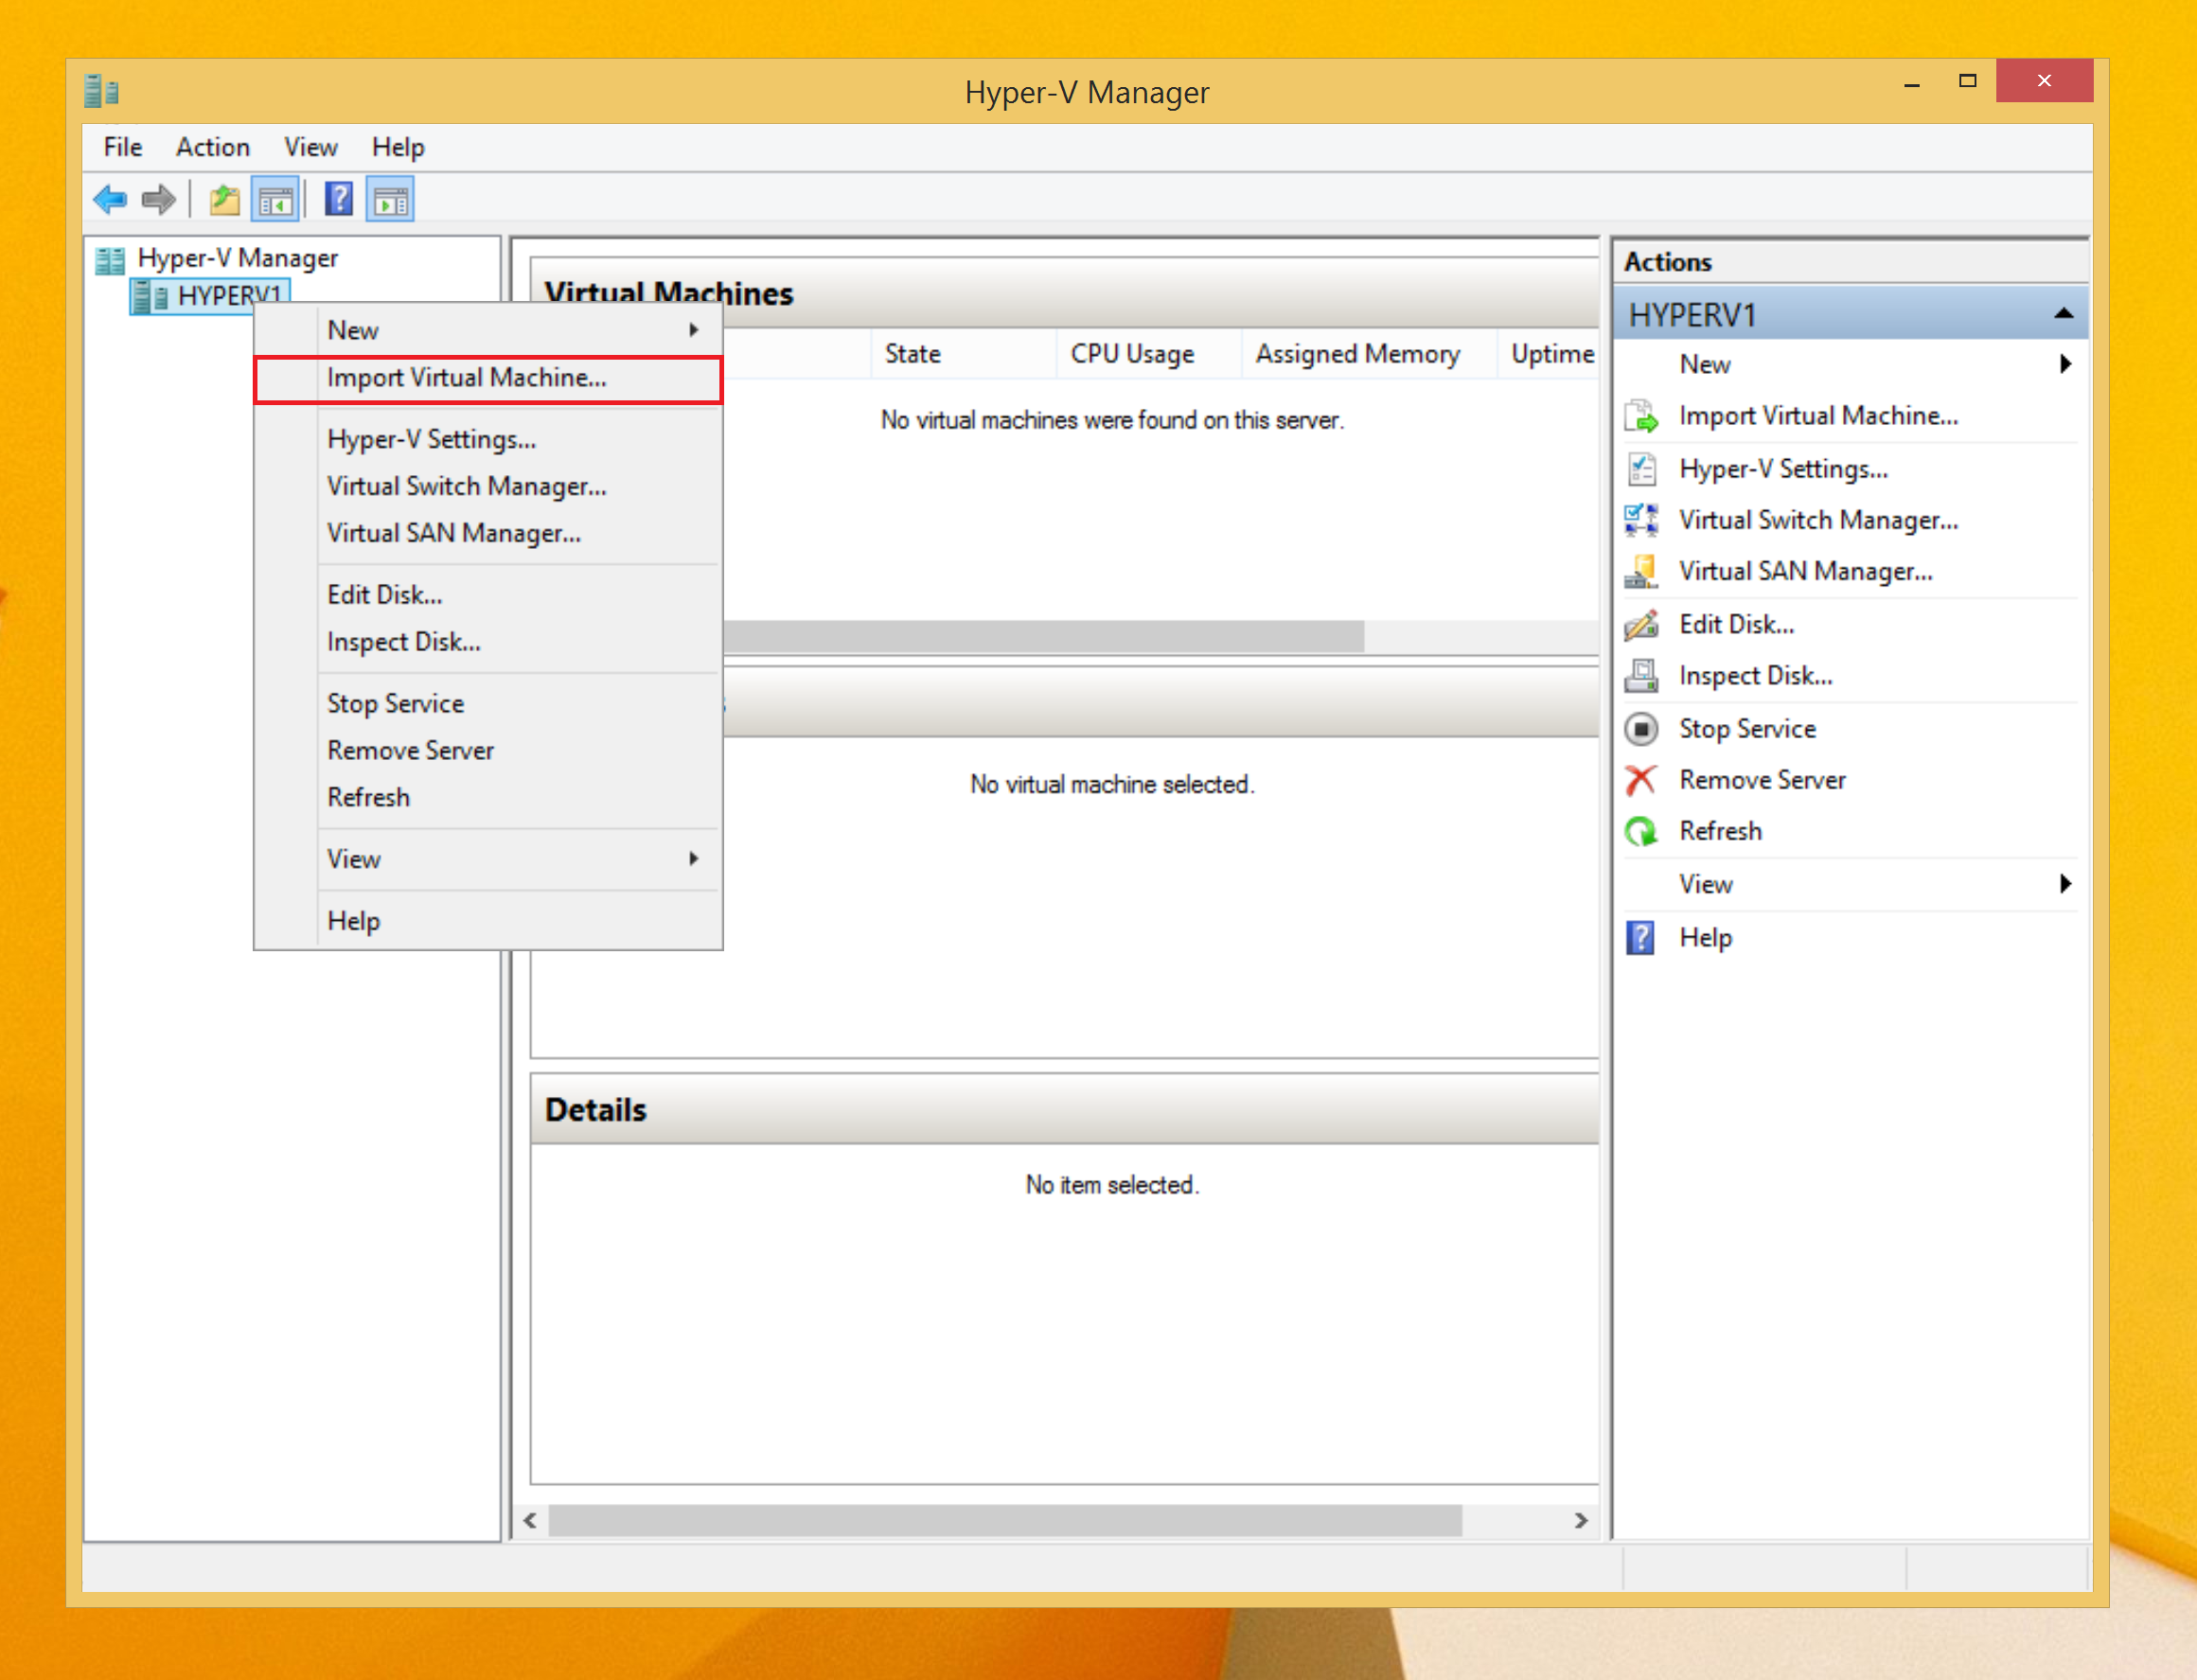
Open Hyper-V Manager snap-in and click on Import Virtual Machine menu.
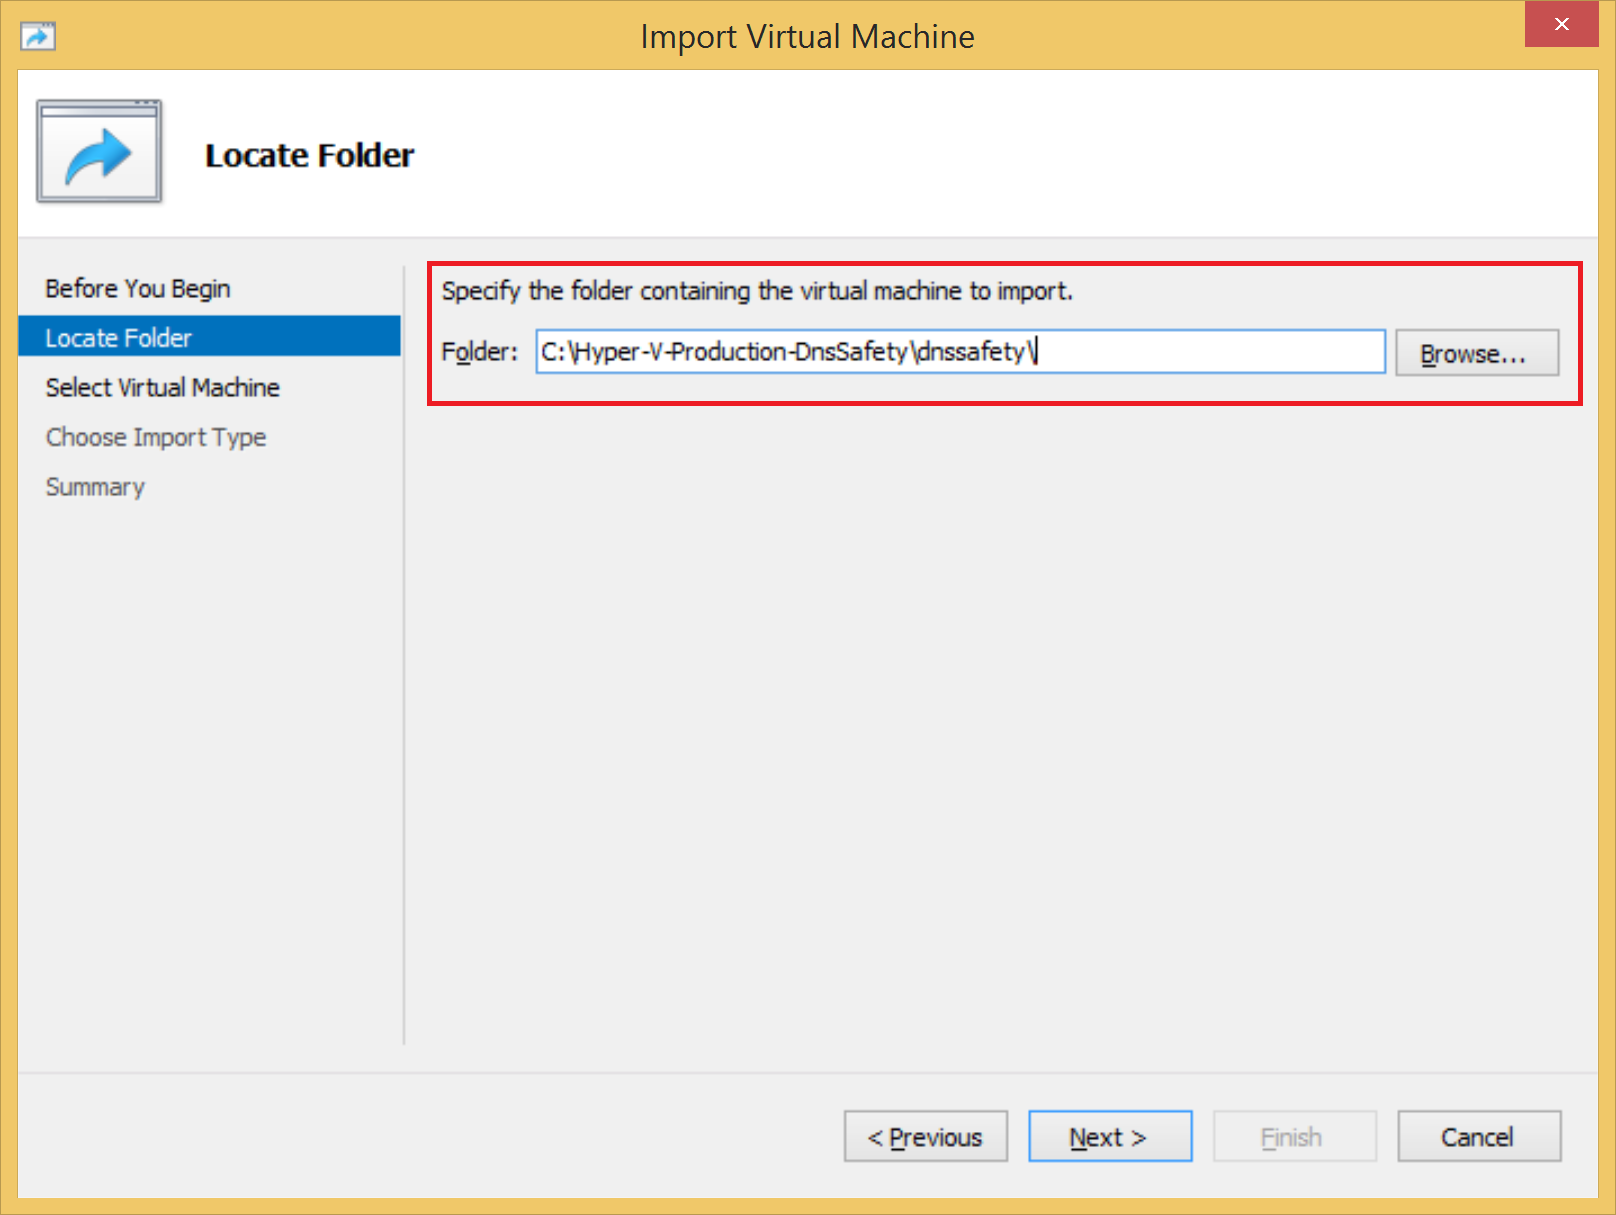
Select the folder where you have unpacked the ZIP archive and click Next button.
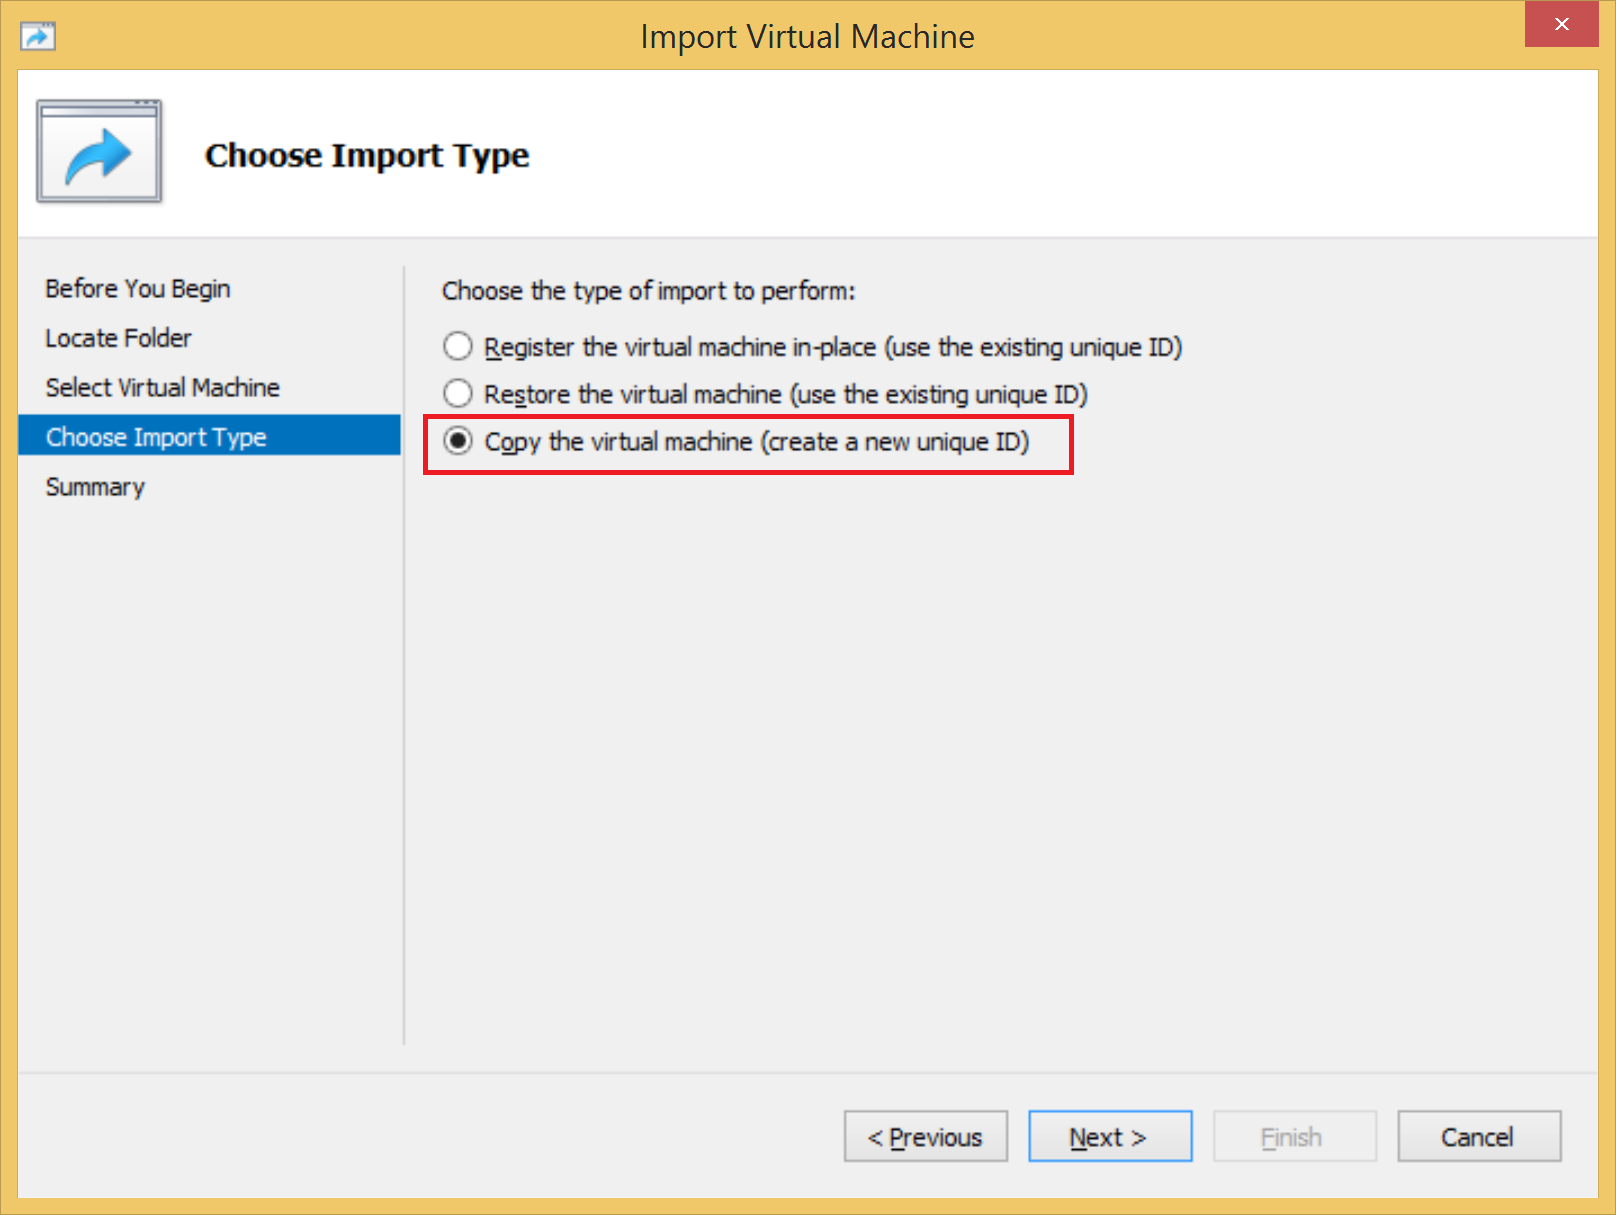
Choose the Copy Virtual Machine option as shown below and click Next button.
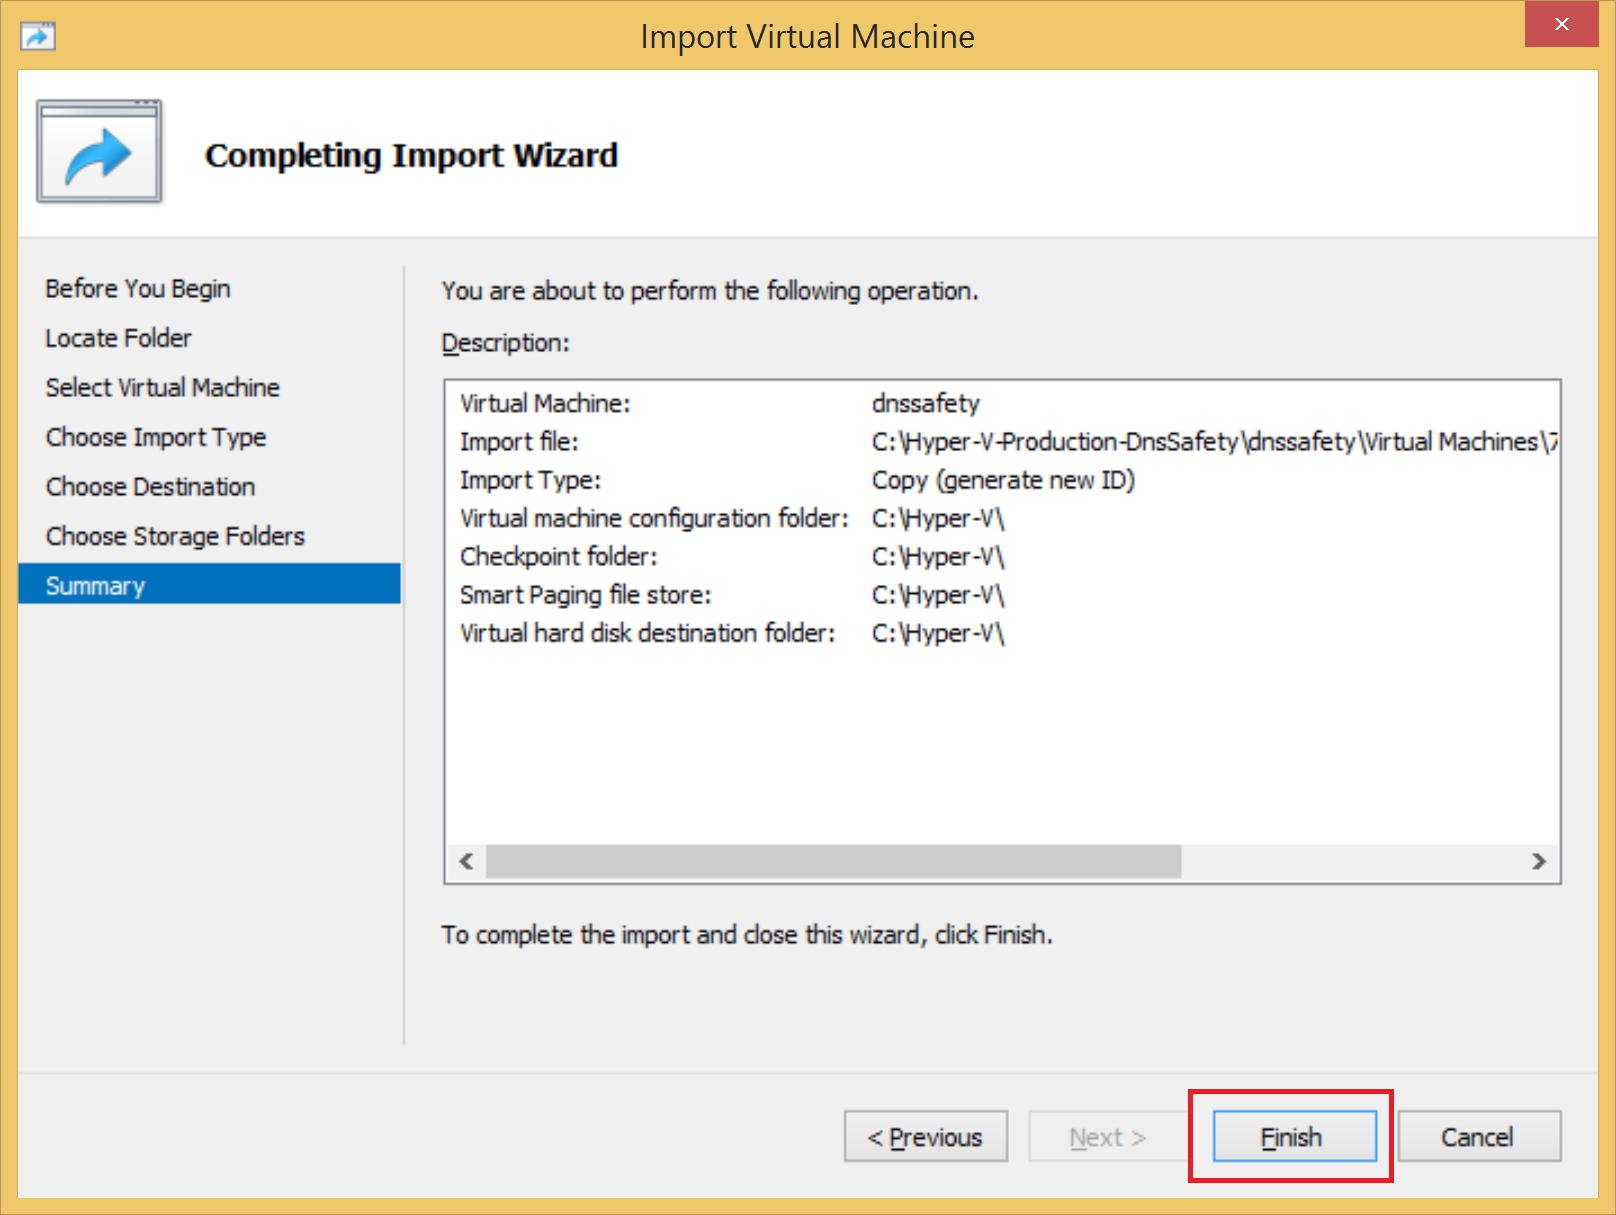
Verify the import parameters and click Finish.
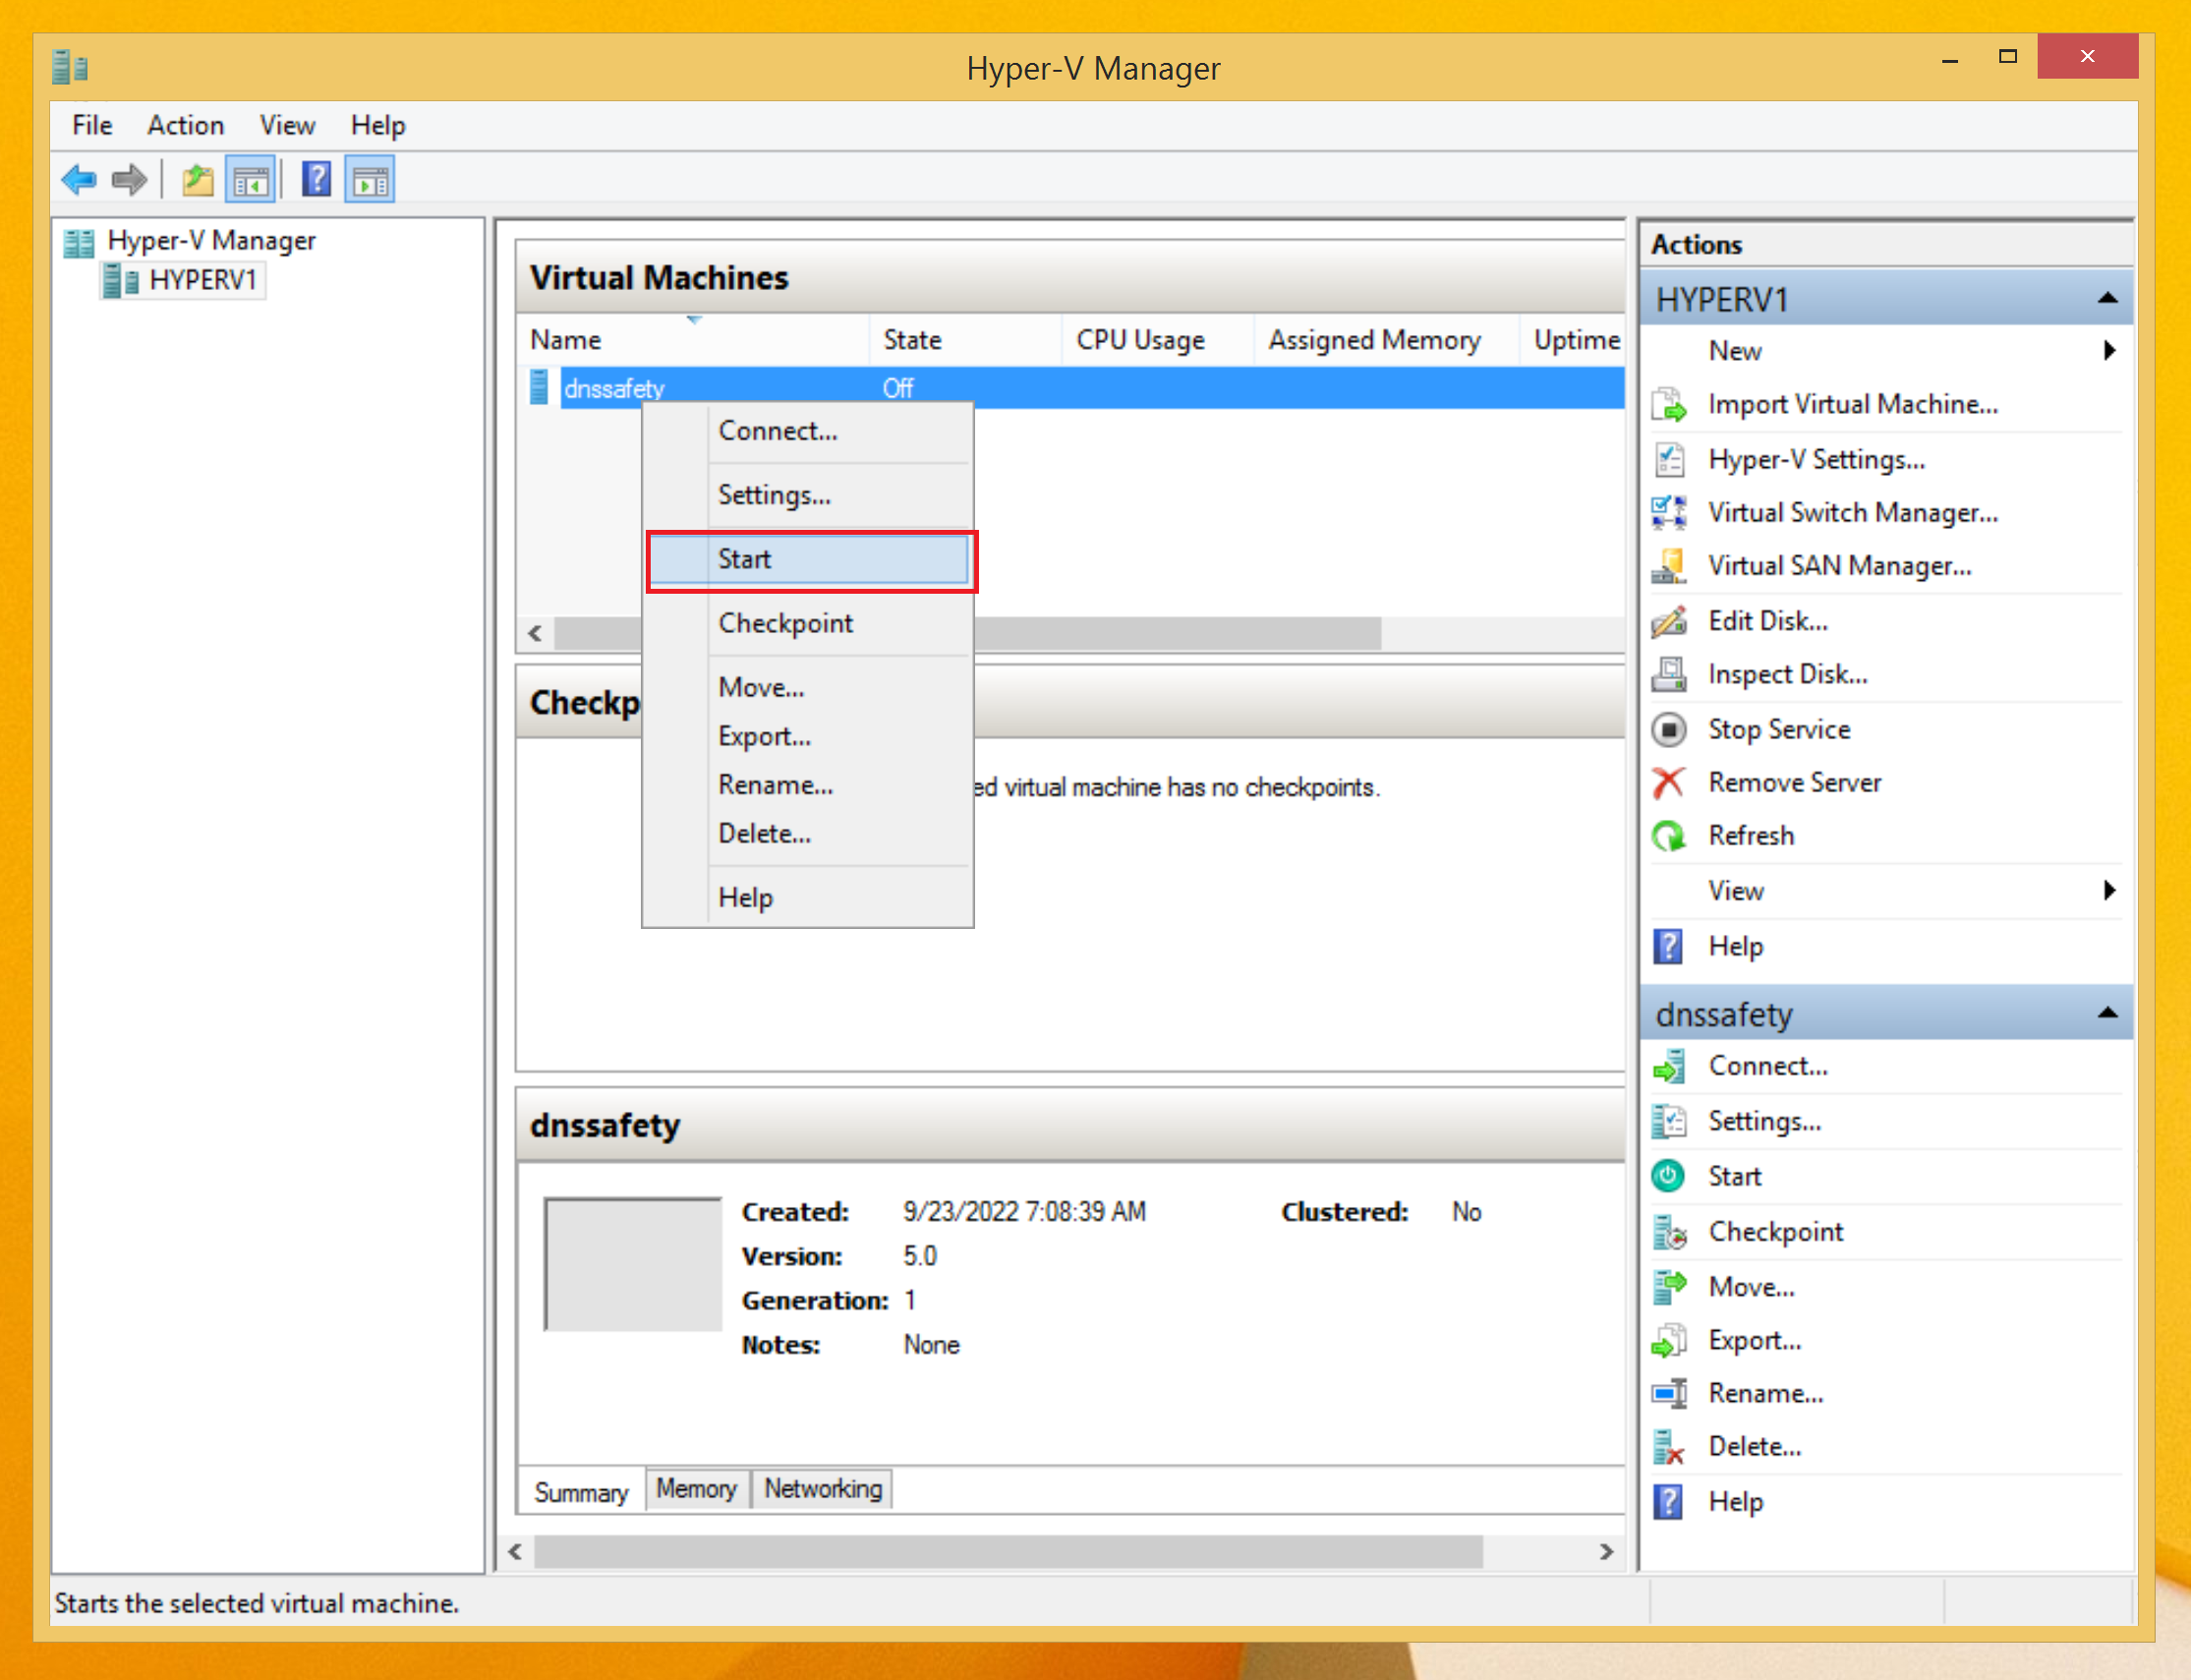
After virtual machine is imported, click the Start menu item.
Wait couple of seconds and the login screen of the virtual machine will be shown.
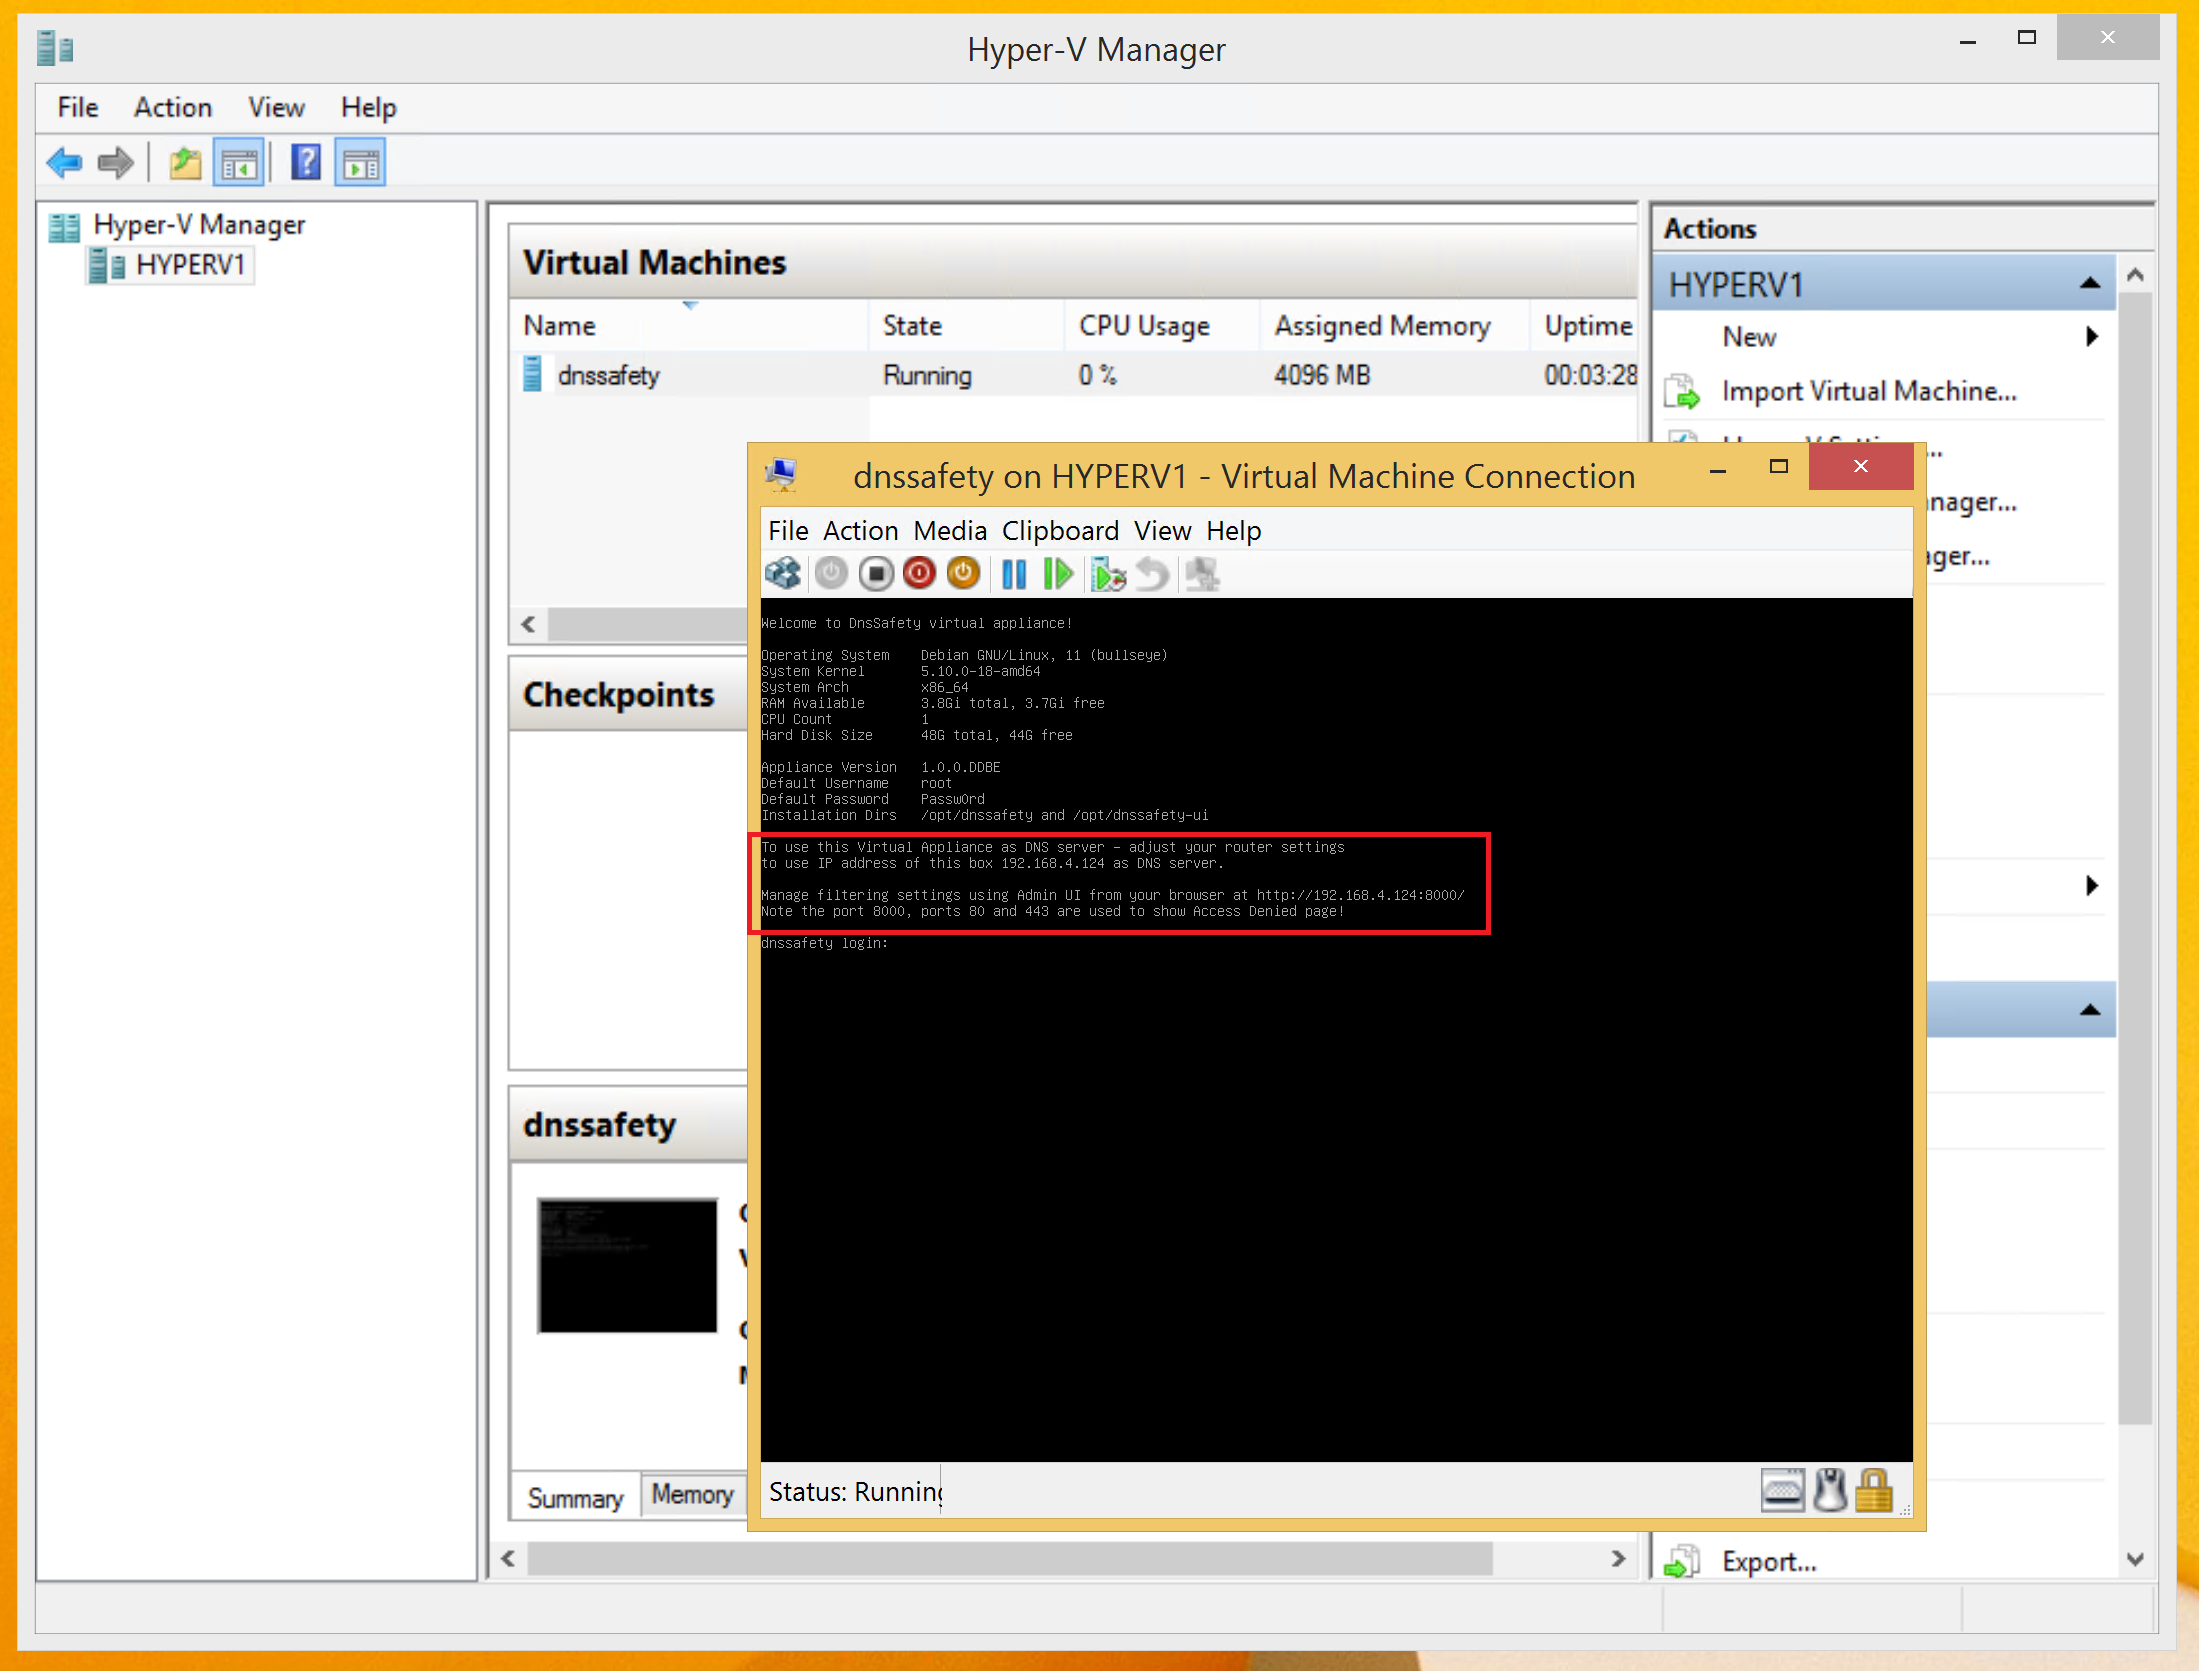
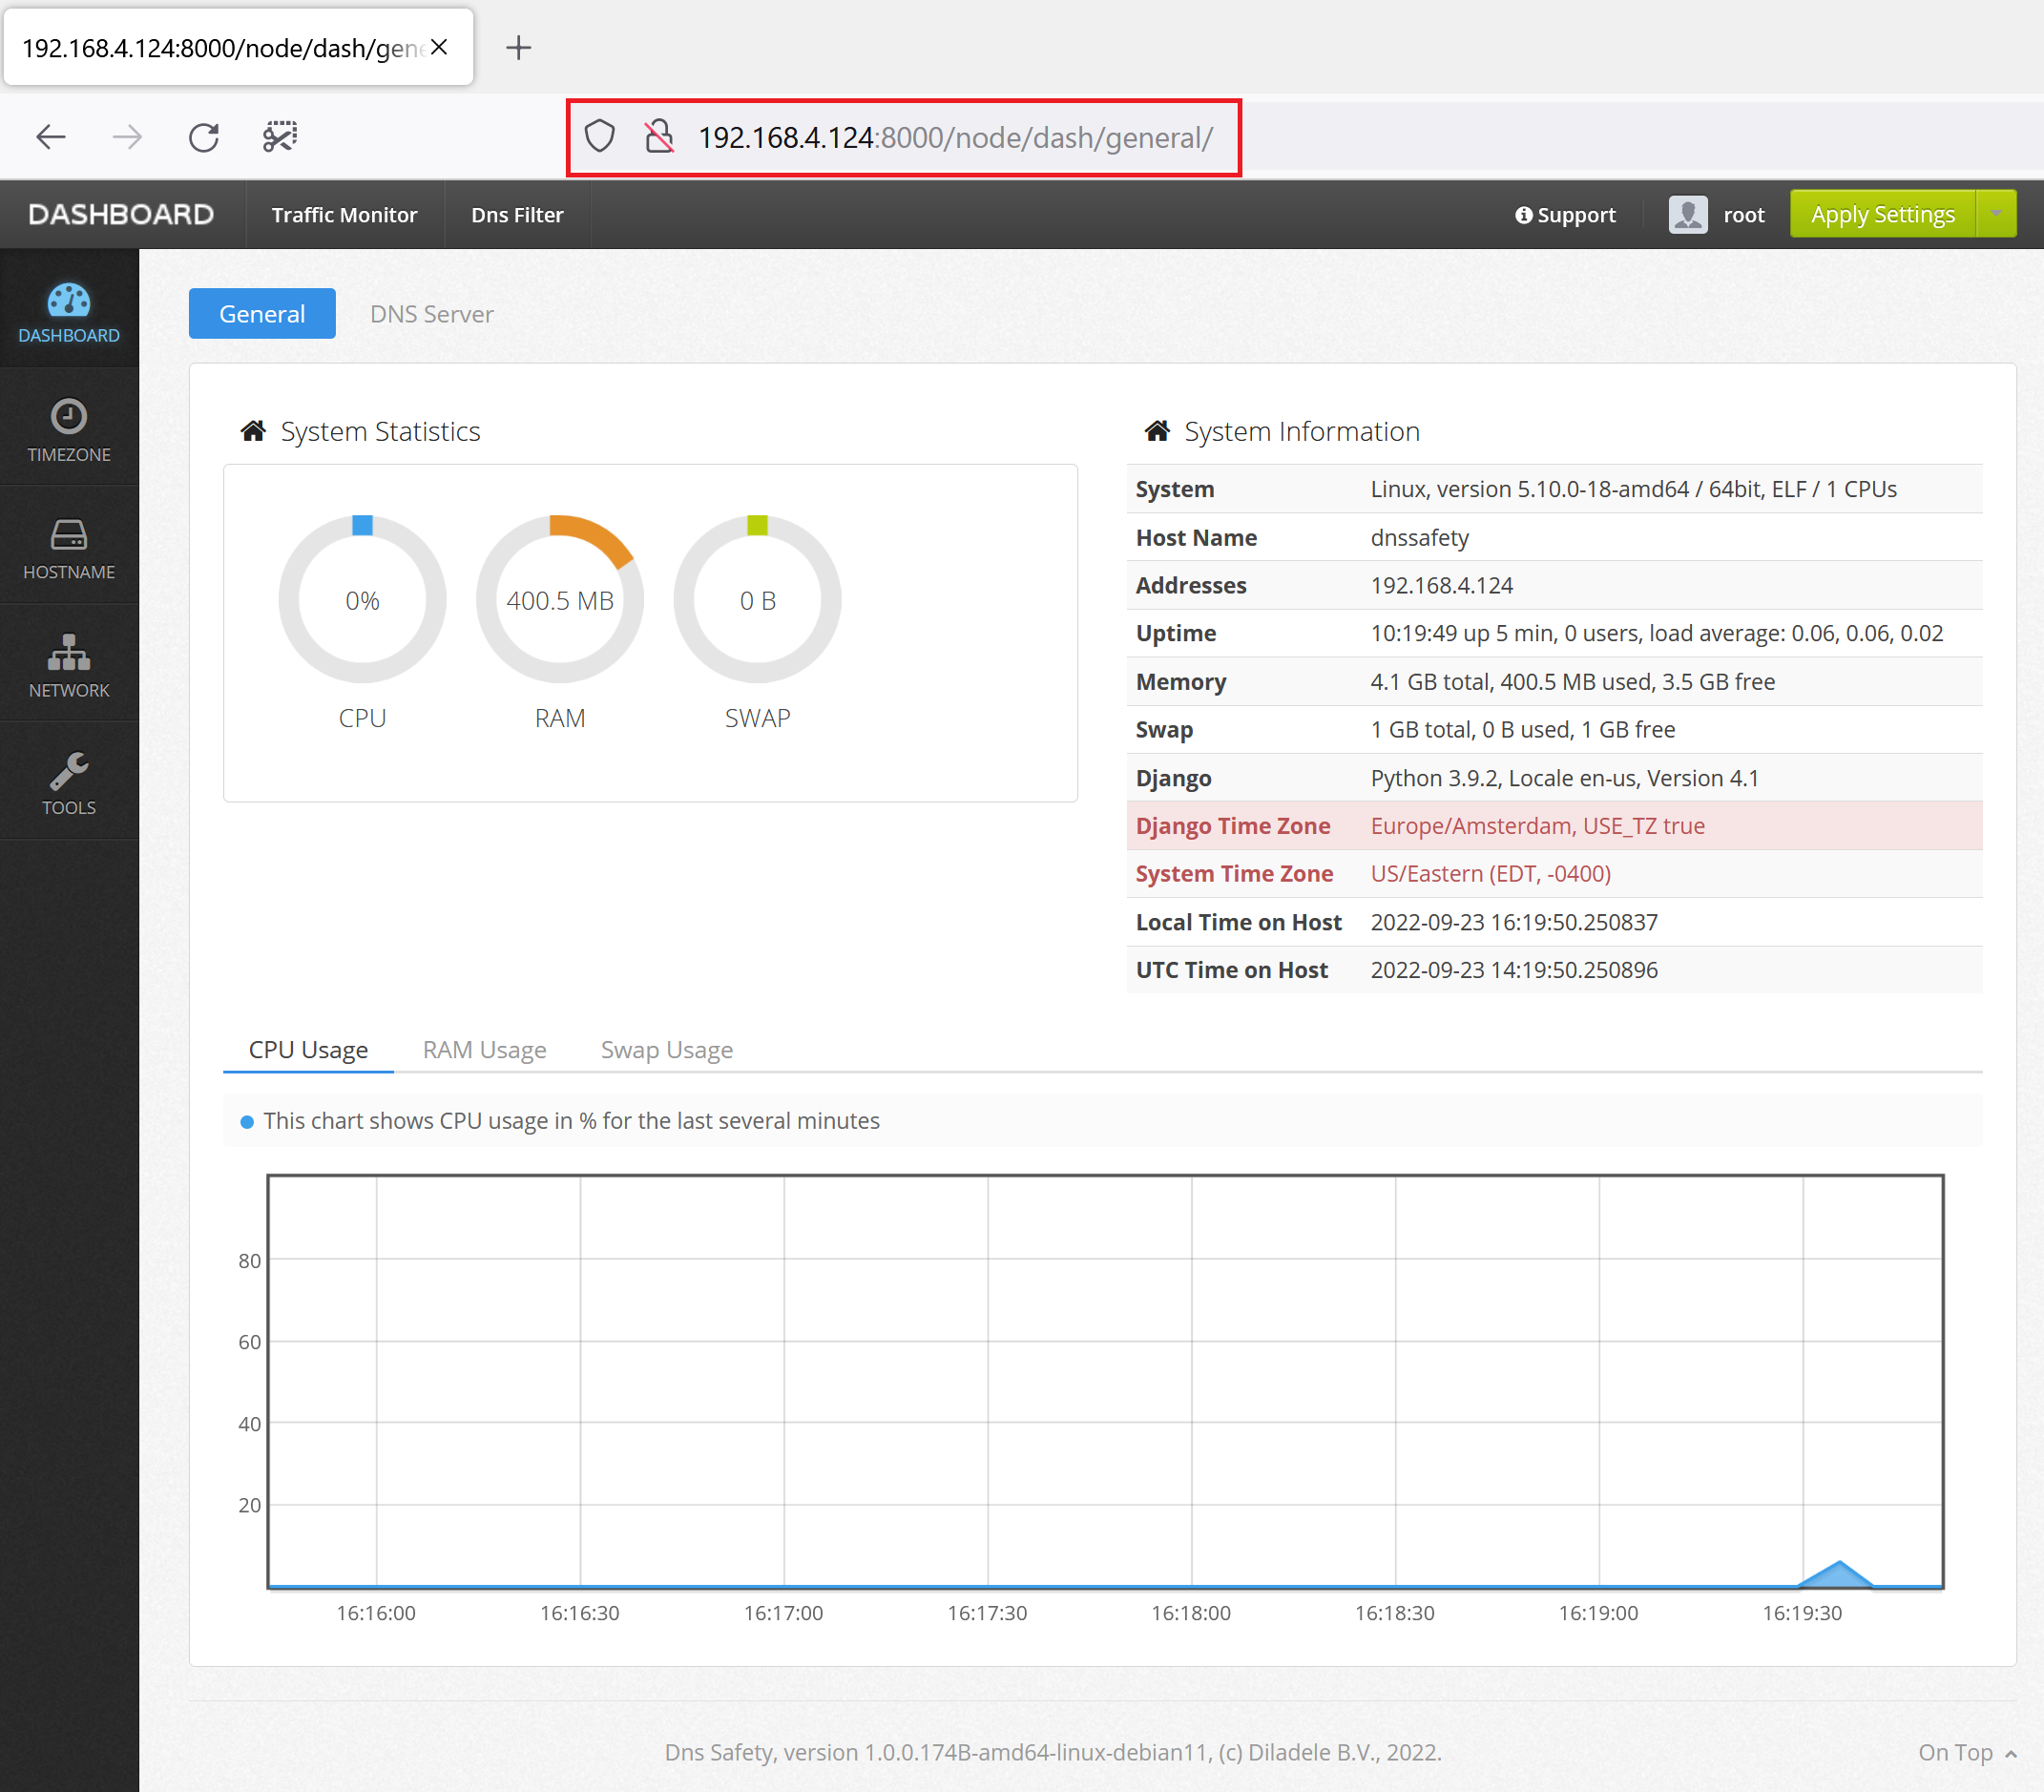
The login screen of the virtual machine shows the IP address that it acquired from your DHCP server (192.168.4.124 in our case). You can then start your browser and connect to Admin UI on port 8000 (http://192.168.4.124:8000 in our case).
The virtual machine of DNS Safety has now been successfully installed in Microsoft Hyper-V.